Planning a thru-hike can be just as daunting as unquestionably hiking a long loftiness trail. Fortunately, both tasks are weightier tackled the same way: one step at a time. To help you make your John Muir Trail dreams come true, weve put together a step-by-step guide to take you from irreflective well-nigh hiking the JMT to unquestionably doing it.
John Muir Trail Basics
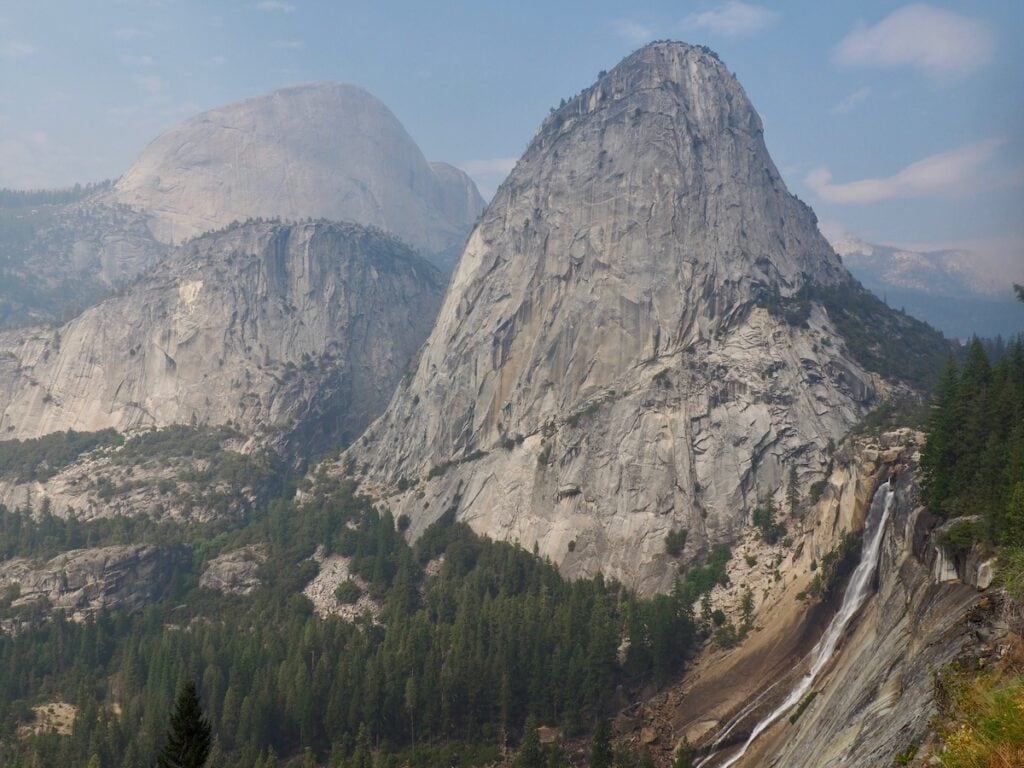
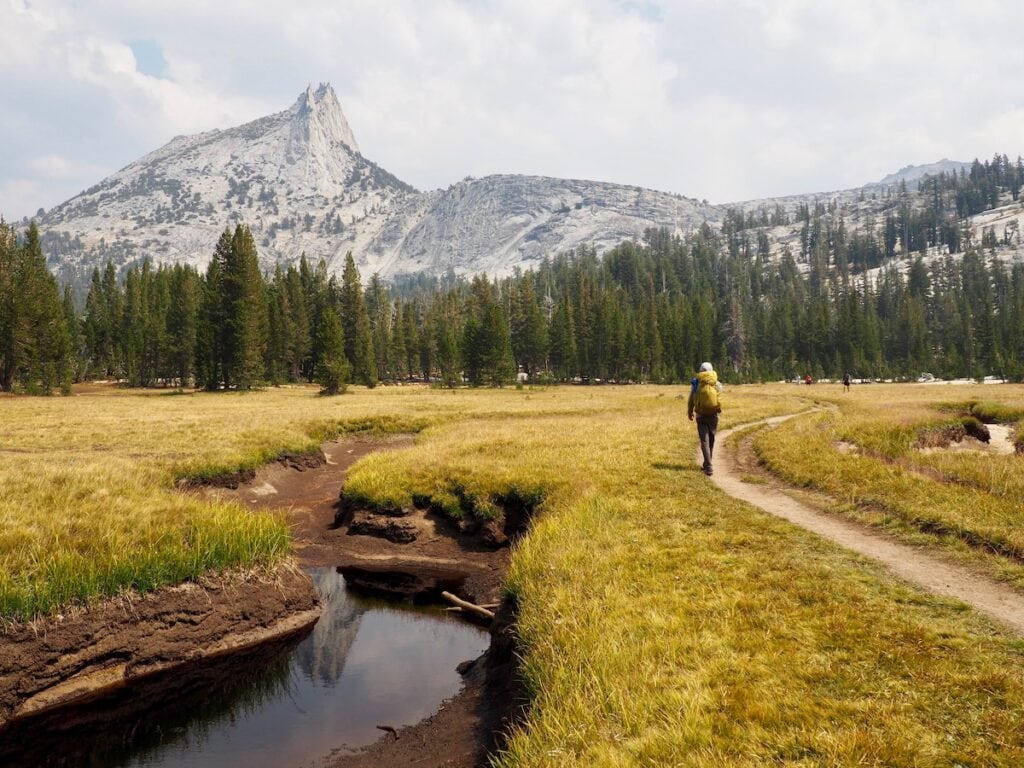
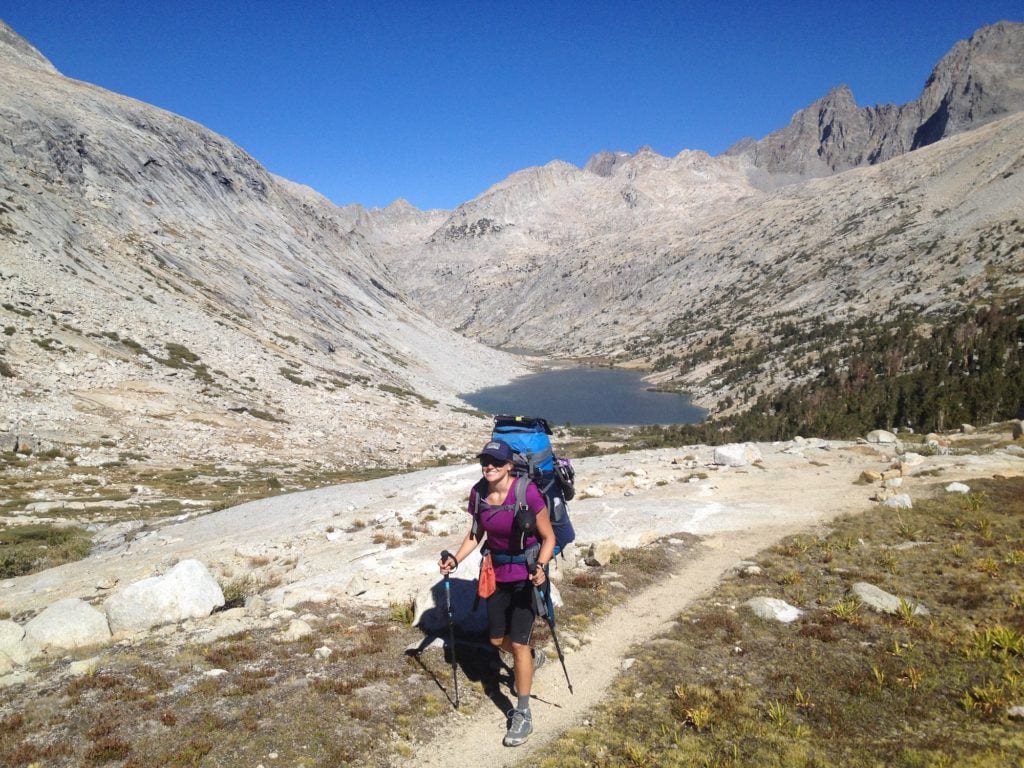
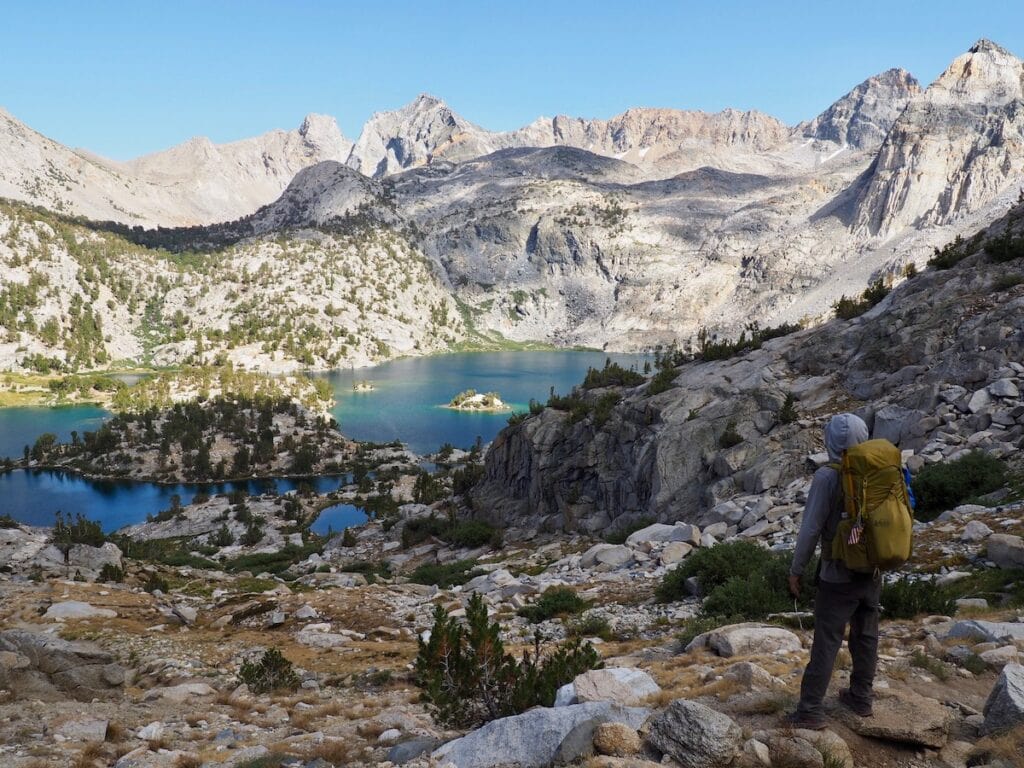
The John Muir Trail is a 211-mile footpath that starts in Yosemite Valley and runs south withal the crest of the Sierra Nevada Mountain Range to the top of Mount Whitney, the highest point in the lower 48 states. Interestingly, the trail’s namesake, John Muir, never unquestionably hiked the JMT; the trails construction began in 1915, the year without his death. It was built atop a network of warmed-over footpaths laid lanugo by the Paiute and other Indigenous people for thousands of years tabbed N��m� Poyo, or the Peoples Paths.
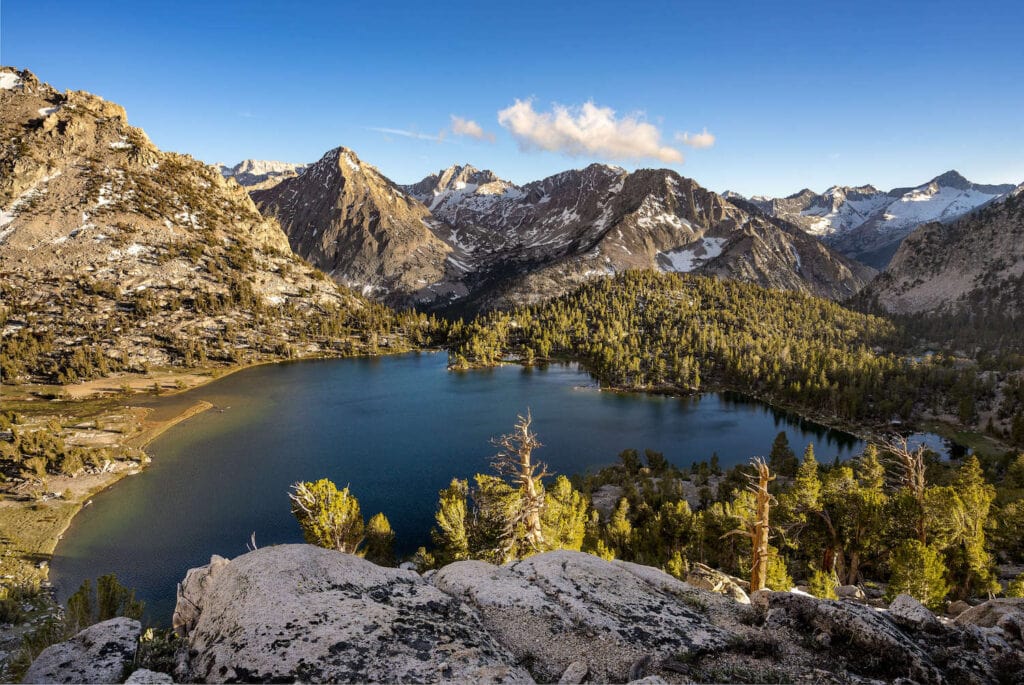
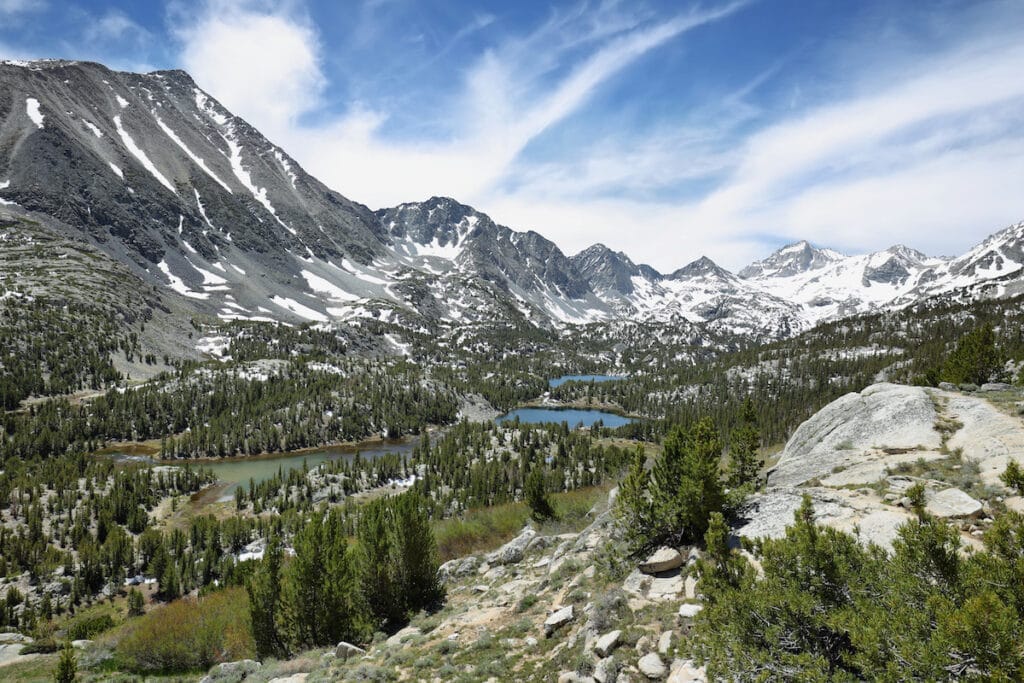
Californias Sierra Nevada mountains are one of the worlds most trappy and rugged mountain ranges, made up of glittering granite that has been uplifted by plate tectonics and sculpted by glaciers. The JMT crosses some of the Sierras highest and most remote terrain. For the majority of your trip, youll have no lamina service and youll navigate no roads. The trail crosses several wilderness areas and three national parks: Yosemite, Kings Canyon, and Sequoia.
Join our polity for wangle to our free member resources!
Download Handy Outdoor Packing Checklists & Trip Planning Guides
Trail Stats
- Total distance: 211 miles from Yosemite Valley to the top of Mount Whitney, plus 11 miles lanugo to the Whitney Portal trailhead
- Days needed: 18-22
- Trailhead start: Happy Isles in Yosemite National Park (Southbound), Horseshoe Meadow or Cottonwood Lakes/Pass (Northbound)
- Best time to hike: July – September, depending on snowpack
- Total elevation gain/loss: 47,000 ft gain/38,000 ft loss (Southbound)
- Permits: Required and very competitive
- Difficulty: Strenuous and logistically challenging
- Dogs allowed: No
- Cell service: Rare
Best Time Of Year To Hike the JMT
The JMT is a upper summer trail, and the weightier time to hike it is typically mid-July through early September to stave prodigious snowfall and avalanches in the winter and dangerous creek crossings in the spring. However, the JMT hiking season is heavily influenced by the winter snowfall in the Eastern Sierra.
In low snow years, it may be possible to hike the JMT starting in June and into mid-October. But early and late season hikers should have significant snow travel wits and be prepared for sudden changes in weather.
In June, hikers may encounter snow on the upper mountain passes, necessitating snow safety gear like microspikes and an ice ax, as well as strong navigational skills when the trail disappears under snow.
During the fleeting summer months (July and August), mosquitoes and wintry flies can be legion, thanks to the well-healed water found withal the trail. Definitely bring a head net, bug spray, and a tent with mosquito netting.
On upper snow years, creek crossings may remain dangerous throughout the summer. Trekking poles, sturdy hiking boots, and a partner can help make crossings safer. In September and October, hikers may encounter snowstorms and frigid overnight temperatures but will encounter fewer bugs.
How Long Does It Take To Hike The JMT?
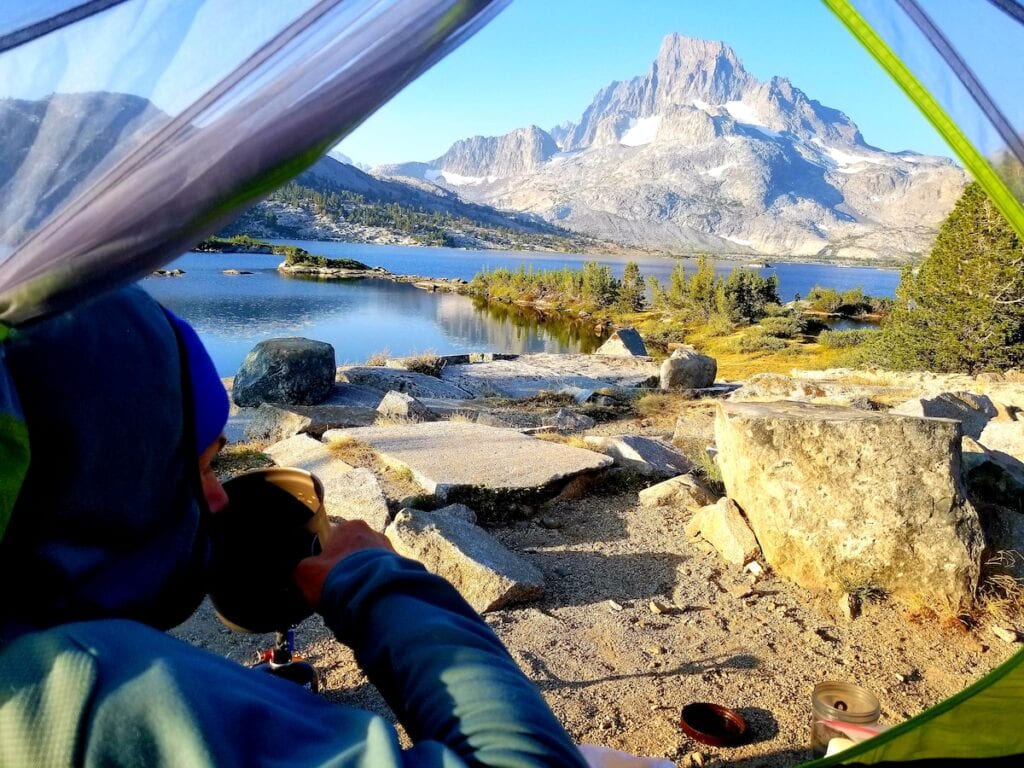
With nonstop Ansel Adams-worthy views, plentiful swimming holes, and once-in-a-lifetime side trips virtually every corner, the JMT is an wits weightier savored. Under the load of a ~35-pound pack, with considerable elevation proceeds and loss, youd be hard-pressed to rush through this trail anyway.
In general, backpackers can expect to imbricate virtually 10 miles a day so most people will hike the JMTs 211 miles in 18 to 22 days. Of course, its possible to imbricate the loftiness much faster, but the largest question to ask is: how long can I sire to spend on the JMT? If youre going to go through the trouble of hiking one of the worlds greatest hiking trails, why not devote as much time as possible to exploring the route?
When I hiked the JMT NOBO in 2020, I took 27 days to hike over 300 miles. The uneaten miles came from the numerous side trips I took off the JMT corridor to explore the myriad lake basins and summits that can only be accessed from the JMT. When BFT Founder Kristen hiked the JMT when in 2014, she took 22 days and hiked roughly 240 miles.
JMT Trail Difficulty
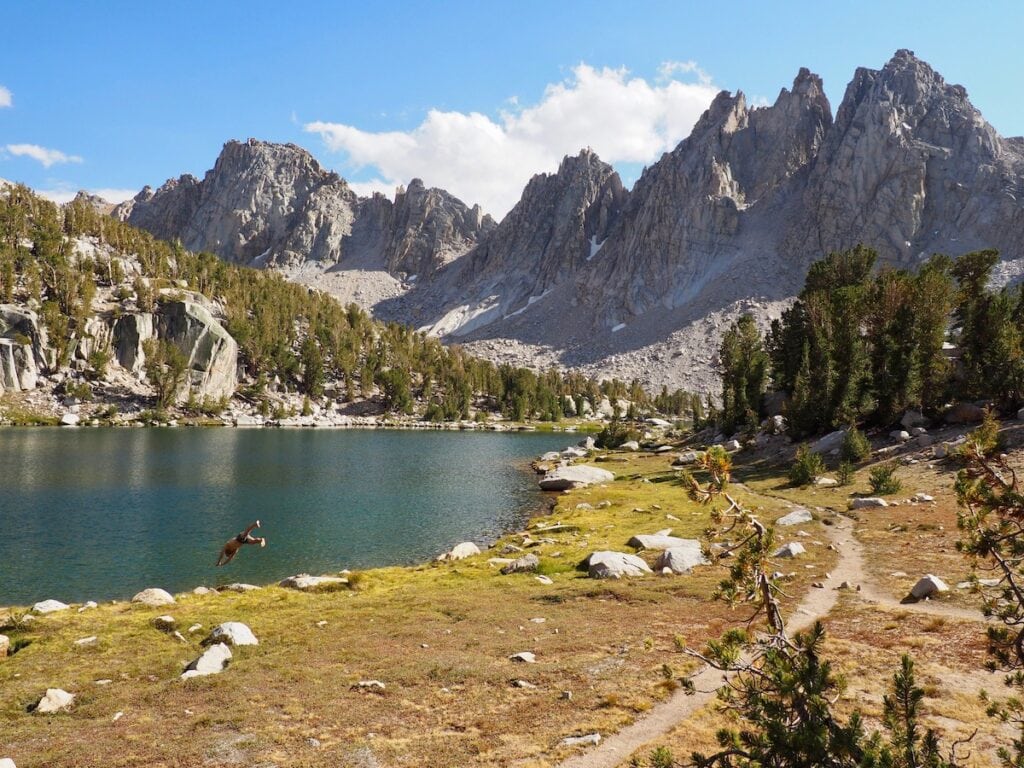
Mile for mile, the John Muir Trail is one of the most epic hiking trails on Earth. But youll be earning all those views with a lot of sweat and maybe a few tears (hopefully no blood!). The trail follows the crest of the Sierra Nevada mountains, rarely dipping unelevated 10,000 feet of elevation.
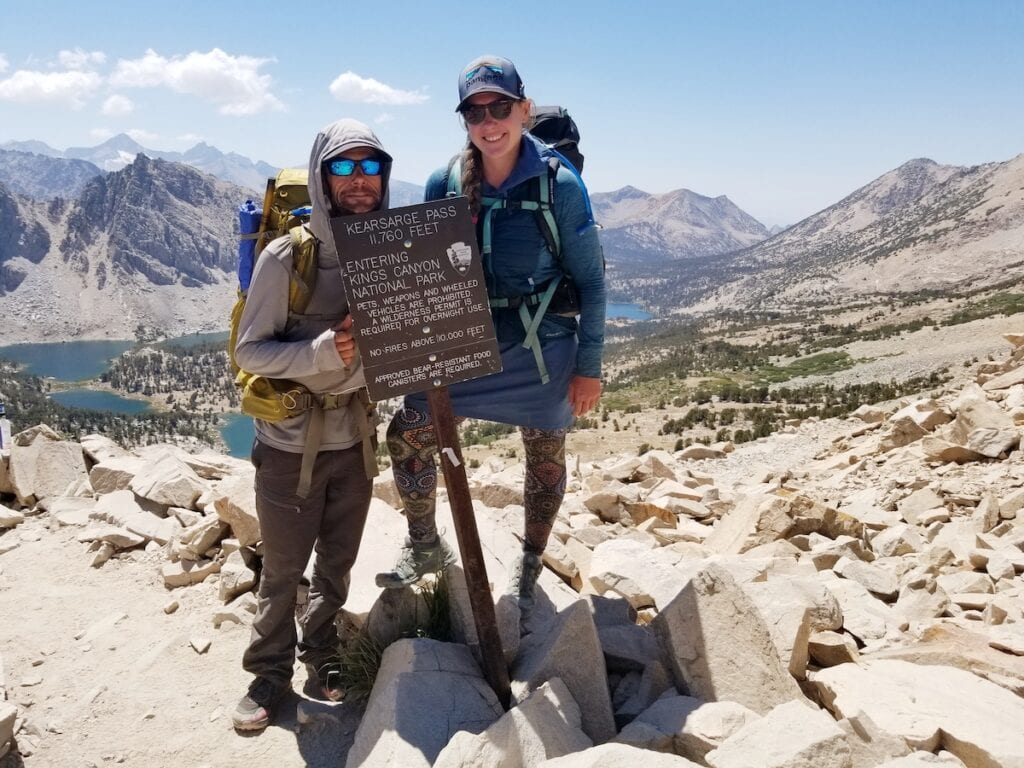
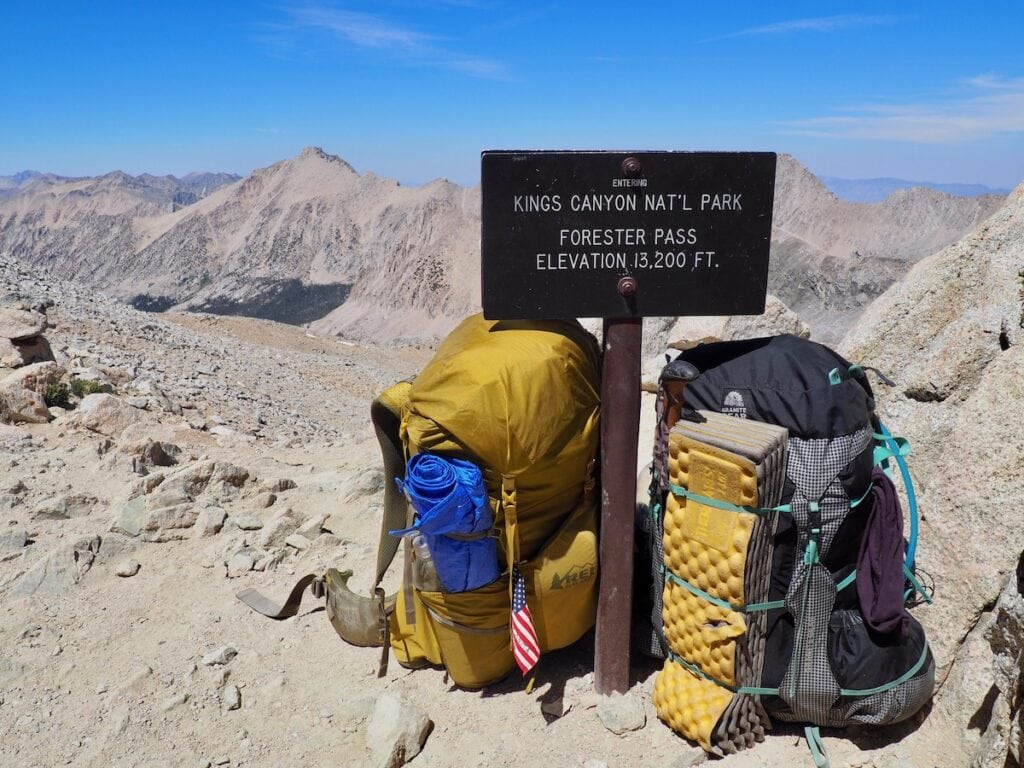
To navigate this soaring mountain range youll need to climb. Over the undertow of 211 miles, youll proceeds over 47,000 feet of elevation, including climbs over eight major mountain passes: Donohue, Silver, Selden, Muir, Mather, Pinchot, Glen, and Forester, the highest pass, at 13,153 feet. In between the passes youll be traversing wideness spectacular lake basins where youre never far from water and where the weightier campsites are usually found.
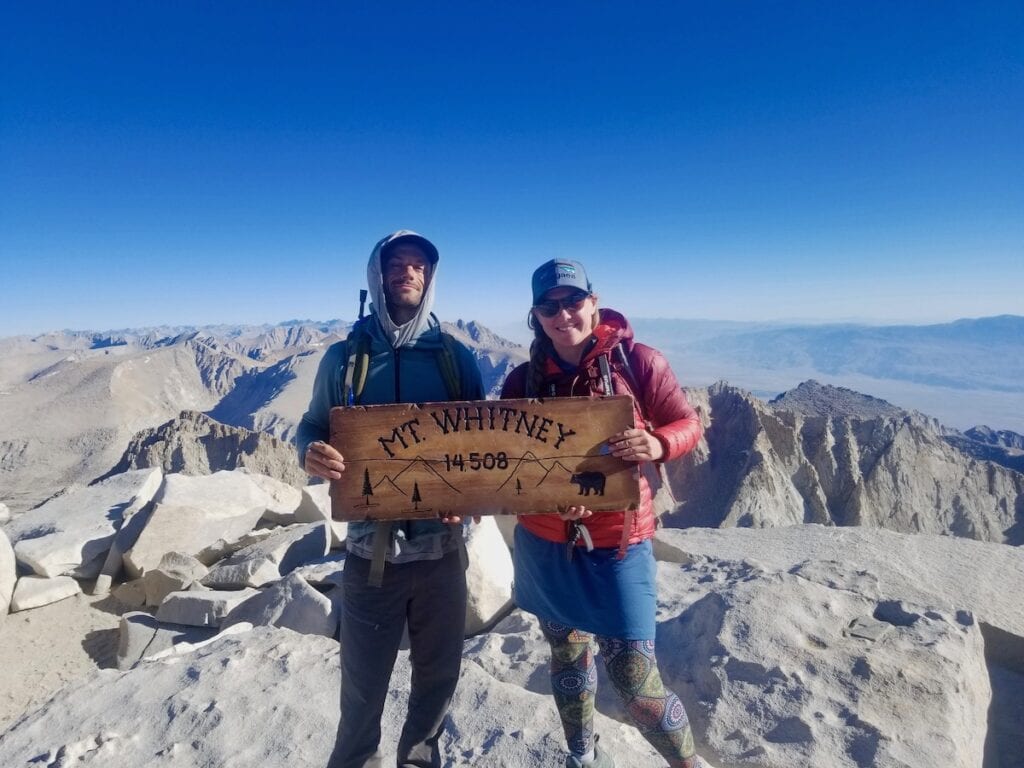
Altitude sickness is a real possibility on the trail, but you can help mitigate its effects by training for your hike, staying well-hydrated and nourished, and giving your soul time to adjust. By starting in Yosemite and hiking the trail south youll have several weeks to work your way up to the trails upper point on top of Mount Whitney at 14,505 feet. This is the official end of the trail, but youll then need to descend 11 miles, lanugo 6,600 feet to Whitney Portal to end your hike (making the grand total 222 miles, not counting side trips).
The numbers can be intimidating but the reality is the JMT is so spectacularly beautiful, so well trodden, marked, and maintained, with plentiful water and campsites that unquestionably hiking the trail is a backpacker’s dream. With unobjectionable planning, training, and preparation, youll be setting off for the greatest hike of your life.
Read next: How To Train For A Thru-Hike
Which Direction Should You Hike the JMT?
Traditionally, the JMT begins in Yosemite Valley, at the Happy Isles trailhead, and runs for 211 miles south to the grand finale on the summit of Mount Whitney.
The main wholesomeness of going Southbound, or SOBO, is that you start at a lower elevation, which gives your legs and lungs time to retread to hiking at altitude surpassing you tackle the highest passes en route to Mount Whitney. Resupply logistics are moreover a little easier hiking SOBO, as youll be worldly-wise to mail resupply boxes to Reds Meadow and Muir Trail Ranch and deal with the trickier logistics of the increasingly remote southern portion of the trail later in your trip. However, getting permits to go SOBO can be difficult. In fact, Yosemite wilderness permits are some of the most sought-after permits in the National Park system.
Around 20% of JMT thru-hikers elect to hike Northbound, or NOBO. However, getting a permit to start from Whitney Portal is moreover difficult, as youre competing versus people who want to hike Mount Whitney, the highest mountain in the lower 48. And youll have to tackle a huge 6,600 foot climb up Whitney at the start of your hike, as well as some of the highest passes in the first week.
Resupply options are moreover few and far between in the southern third of the trail, usually requiring significant side trips. Youll have to icon out your resupply plan between Muir Trail Ranch and Mount Whitney whether youre hiking NOBO or SOBO but it can finger easier to tackle this towards the end of your hike rather than at the beginning.
How To Get John Muir Trail Permits
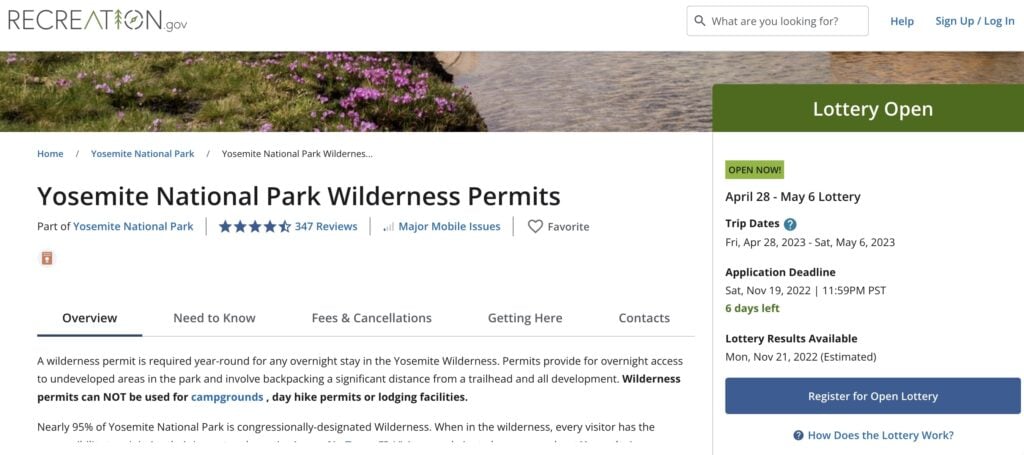
Before you do anything else, youll need to surmount the single hardest obstacle in planning a JMT thru-hike: getting a permit. I wont sugarcoat it: JMT permits are unreceptive to Golden Tickets. According to the National Park Service, 97% of JMT permit applications are denied, but there are a few tips and tricks that can help increase your chances of getting a permit.
On a thru-hike of the JMT, you will pass through three National Parks and several variegated wilderness areas and National Forests. Fortunately, you only need one permit, which will imbricate your unshortened hike. Its not unquestionably a JMT permit; rather its based on your starting trailhead. So if you start your hike in Yosemite, you need a permit from Yosemite National Park. If you start in Inyo National Forest, you need a permit from Inyo National Forest.
When applying for a SOBO permit from Yosemite National Park, there are two main trailheads: Happy Isles and Lyell Canyon. When you wield for either of these permits, youll moreover need to select Donohue Pass Eligible so that you can exit Yosemite National Park over Donohue Pass to protract south on the JMT. Yosemite National Park only issues 45 wilderness permits for Donohue Pass per day. Of these, 20 are misogynist for the Happy Isles to Past LYV (Donohue Pass eligible) trailhead and 25 are misogynist for permits using the Lyell Canyon (Donohue Pass eligible) trailhead.
By far the most coveted permits are those issued by Yosemite National Park to start at the Happy Isles trailhead, as well as those issued by Inyo National Forest to start at the Whitney Portal trailhead. But while those are the traditional starting points for SOBO and NOBO hikes, respectively, they arent the only options.
On my 2020 NOBO trek, I started from the Horseshoe Meadow trailhead, 28 trail miles south of Mount Whitney, to stave the competition at Whitney Portal.
For permit deadlines and increasingly information on how to apply, trammels out our post on How To Wield for a Southbound JMT permit.
As worrying and discouraging as permits and tralhead quotas can be, they are necessary to protect the trail and the quality of the wilderness experience. If everybody who wanted to hike the JMT in July and August were unliable to go, the mountains would be overrun with people, and the trails, campsites, and water sources would be quickly degraded.
Do NOT be tempted to hike without a permit! The JMT crosses hundreds of miles of remote wilderness, but its urgently patrolled by woodland park rangers. I had my Inyo National Forest permit checked three times, once in Kings Canyon National Park and twice in Yosemite. I moreover met a group of four young hikers from Seattle who were ending their JMT hike early considering they didnt have a permit and got unprotected by a ranger and were facing steep fines if they continued. Flaunting permit rules can moreover get you vetoed from future permit lotteries.
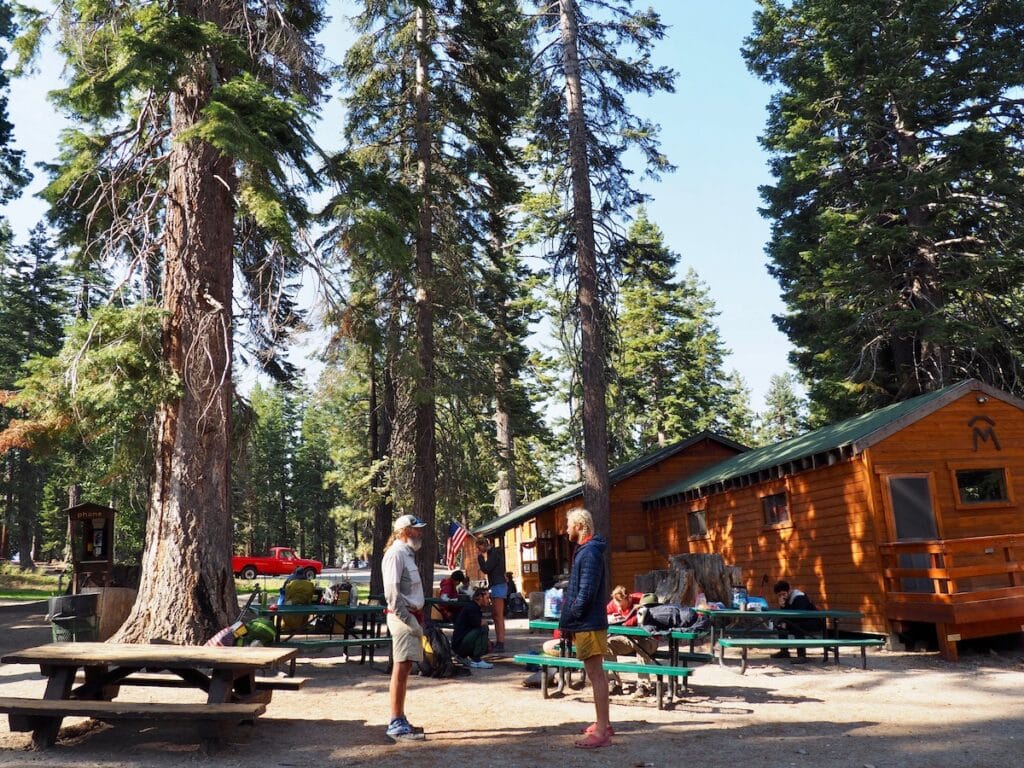
How To Get To the JMT
Whether you hike the JMT SOBO or NOBO, youll be ending your hike hundreds of miles from your starting point. There are a few ways to get to and from the starting and ending trailheads of your hike, depending on whether you have your own car or will be relying on rides or on public transportation.
If you have your own car, its weightier to park it at your ending trailhead and get a ride or take public transportation to the start of the hike. That way you can end triumphantly at your car and momentum yourself to a victory meal and a hot shower. Most of the trailheads in the Sierra indulge for long-term parking but trammels with the local ranger station and let them know your dates of travel.
If you plan on taking public transportation at the start or finish of your hike, alimony in mind that the options are often easier in Yosemite, which is serviced by YARTS: Yosemite Area Regional Transportation System. Scenic Highway 395, which runs withal the eastern side of the Sierra, is serviced by Eastern Sierra Transit buses and the small towns withal 395 are often very whiz at catering to hikers, with several private shuttle companies options based in Mammoth, Bishop, Independence, and Lone Pine.
Hitchhiking from the various trailheads into town is moreover worldwide practice and you can usually get a ride with a fellow hiker or day tripper in mart for tales of your epic venture (and maybe a few bucks for gas). Not everybody is well-appointed with this option, but if you trust your gut, hitchhiking can be a fun part of your hiking adventure.
For increasingly info on which cities to fly into, a dispersal of the various public transportation options, as well as route and contact info for bus and shuttle companies, trammels out our post on John Muir Trail Transportation Guide and Planning Tips.

Planning Your JMT Itinerary
When you wield for your JMT permit, you will need to know your starting date, ending date, and where you plan to spend your first night on the JMT. Once you have your permit, its tempting to want to plan out where youll spend every night in between, but its moreover important to stay flexible. Once you’re on trail, a multitude of factors (weather, upland gain, misogynist campsites, fellow hikers) will stupefy how many miles you imbricate each day.
On average, most people will hike virtually 10 to 15 miles a day. The JMT is happy with plentiful campsites and well-healed water sources, so dont stress too much well-nigh finding a campsite each night. Plane if the tent sites within sight of the trail are all taken, youre likely to find many increasingly within a half mile of the trail.
Always follow Leave No Trace principles and select established campsites on durable surfaces. Never set your tent up on top of fragile vegetation – expressly in the tall zone – and dont zany within 200 feet of water sources.
Hiking the JMT involves gaining and losing considerable elevation up and over numerous high-altitude passes.The weightier strategy for tackling these passes is to zany near the wiring the night surpassing so you can hike the pass first thing in the morning when your legs are fresh and the weather is the most stable. Camping at or near the top of passes isnt usually a unconfined idea due to upper winds, unpredictable weather, and frigid nighttime temperatures at altitude.
Youll moreover need to plan out where youll pick up your resupply boxes withal the way, which well imbricate below.
If you’re curious well-nigh what a sample JMT itinerary looks like, trammels out Kristen’s 3 Week John Muir Trail Itinerary, where she highlights the weightier viewpoints, campsites, swimming holes, and increasingly during her 22-day hike.
What To Eat on the John Muir Trail
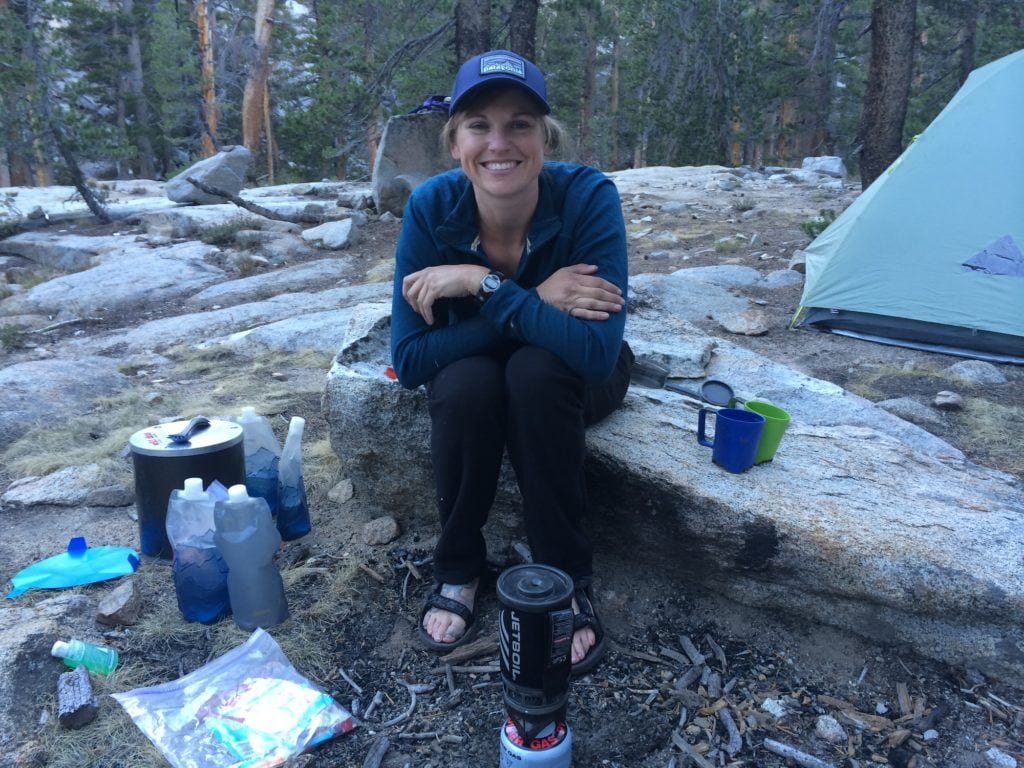
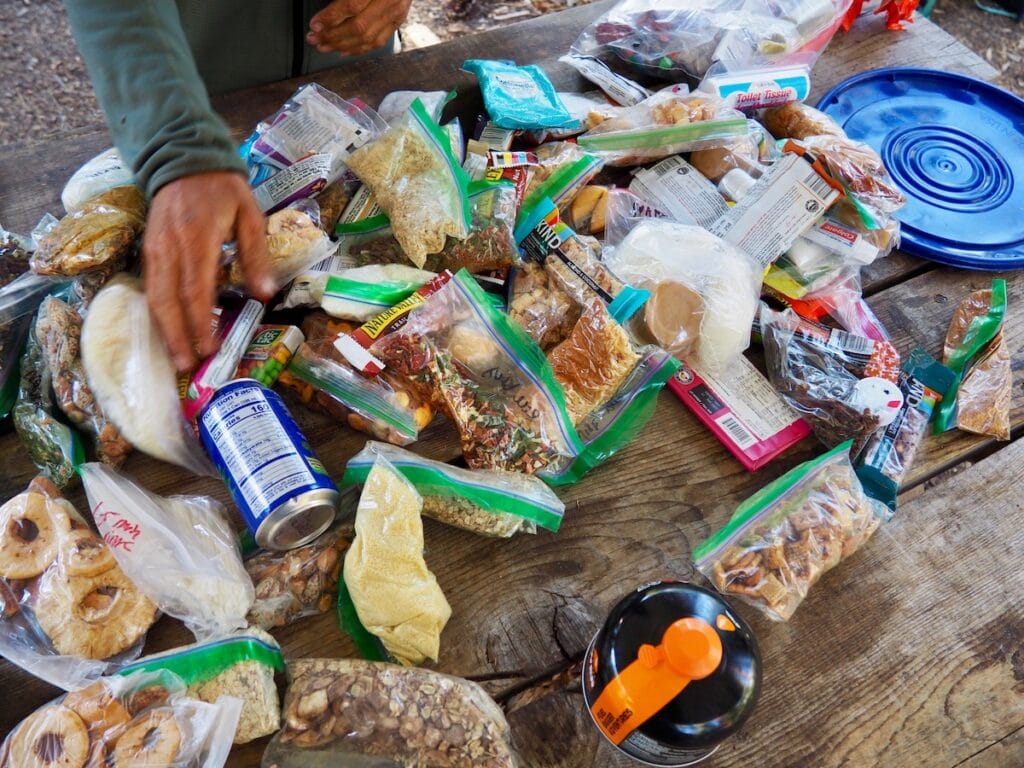
On the JMT, you will spend virtually three weeks on trail, far from restaurants and grocery stores so you will need to pack or mail yourself all your meals for 20-plus days of strenuous hiking. You will likely be ravenously hungry on your hike, but of course, you cant bring infinite food, as you will need to siphon it on your when and fit it into an tried withstand canister each night to alimony critters out of your precious supplies stash.
For each day on the JMT, youll want to bring breakfast, lunch, and dinner, plus lots of snacks! There’s a lot of information online well-nigh the staggering value of calories burned while backpacking (over 500 calories an hour!), but unless youre really into calorie counting in your daily life, its not necessary to get too bogged lanugo by numbers when planning a backpacking trip. As an easy rule of thumb, aim to bring virtually 2 to 2.5 pounds of supplies per person per day which should be virtually 3,000 to 4,000 calories per day.
When shopping for the JMT, seek out calorically dumbo foods that can be repackaged neatly into ziplock bags. You want the highest quantity of calories and nutrients in the smallest and lightest package to maximize the value of each supplies item. Dont buy anything low calorie or low fat.
Also remember, you will have to siphon your trash for at least a week so you dont want foods that are messy or smelly.
Store-bought dehydrated meals have gotten increasingly largest in terms of both taste and quality ingredients with several companies making organic meals that cater to an variety of dietary restrictions. In the interest of saving space in your withstand canister and wearing lanugo on trash, youll need to repackage these meals into ziplocks. Its cleaner and increasingly efficient to reheat dehydrated meals in an insulated pot with an insulating cozy than in the foil bags.
Pro Tip: divide store-bought meals into multiple servings and add uneaten dehydrated veggies (these can be bought in bulk), a protein such as a tuna packet or salami, and an instant grain like couscous or rice to make an unobjectionable portion. One of the easiest ways to add uneaten calories is to bring a plastic container of olive oil and add a tablespoon or two to each meal.
For increasingly tips and recipes visit our John Muir Trail Supplies Shopping List and Best Lightweight Vegan Backpacking Meals.
How To Resupply on the John Muir Trail
One of the biggest logistical challenges of the JMT is figuring out how to resupply your supplies withal the way. Youll spend much of the trails 200-plus miles immersed in wilderness, far from grocery stores and restaurants so youll need to mail yourself several resupply packages withal the way. The most worldwide resupply spots on the JMT (listed SOBO) are:
- Reds Meadow (mile 60.8)
- Vermillion Valley Report (mile 88.1 plus 12 mile side trip off JMT or ferry wend ride)
- Muir Trail Ranch (mile 106.1)
- Bishop Pass trailhead/ Bishop (mile 136.2 plus 23.6 mile round trip side trip off JMT)
- Onion Valley trailhead/ Independence (mile 180.3 plus 15 mile side trip off JMT)
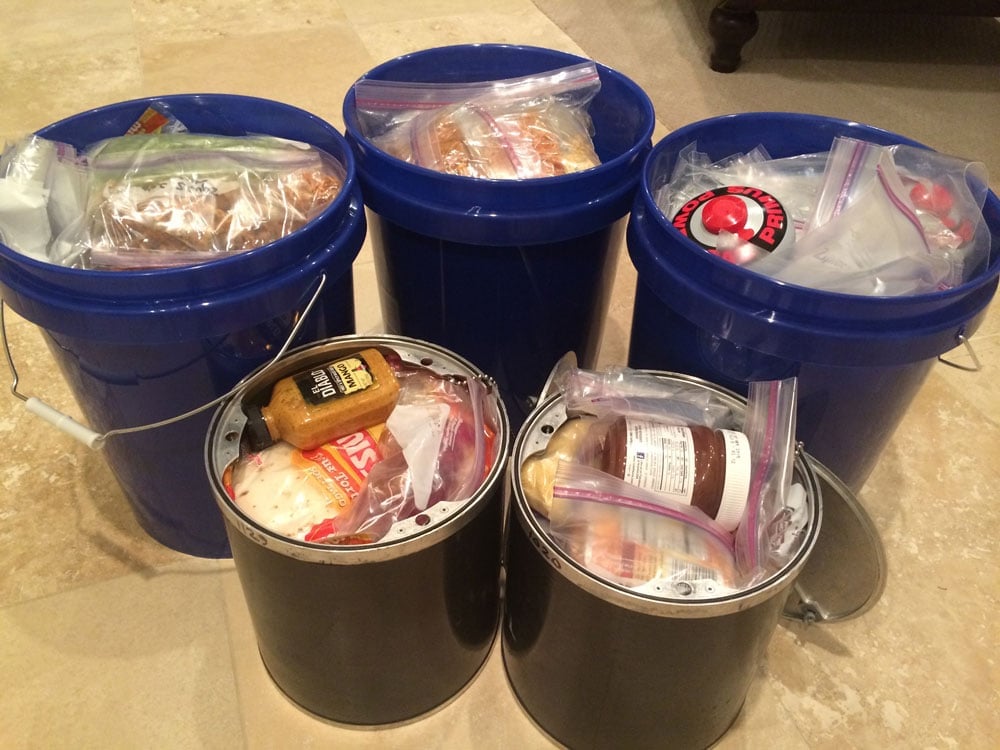
Most JMT hikers will take wholesomeness of the Reds Meadow and Muir Trail Ranch reservices, as they are both located a short loftiness from the JMT. Both of these require mailing well-nigh a weeks worth of supplies in a box or 5-gallon bucket, at least two weeks surpassing you uncork your hike. Both Reds Meadow and Muir Trail Ranch have very specific instructions for how to pack and mail your resupply on their respective websites and increasingly info can be found in our blog post How To Resupply on the John Muir Trail.
You will likely moreover need to unify a third resupply in the southern portion of the trail, as there are 117 miles of trail to hike between MTR and Whitney Portal. At an stereotype backpacking pace of 10 miles a day, this section will take at least 11 days. Some people can hike fast unbearable and stretch their supplies supply to stave this third resupply but this is not recommended as you definitely dont want to finger rushed or low on calories towards the end of your hike.
The largest plan is to unify for a supplies waif at Onion Valley trailhead or one of the other side trails that workshop off the JMT. The downside is that these will all require significant side trips. For example, Onion Valley is a 15-mile round trip detour, but its moreover spectacularly trappy with many spanking-new camping options withal the way. There are moreover a few woodland outfitters who will meet you on the JMT with your resupply, carried in style by pack mule. These options tend to be expensive but can be made increasingly reasonable by splitting the service with several other hikers.
For lots increasingly tips, tricks, and info well-nigh strategizing, packing, and mailing your resupplies to the various resupply points on the JMT, read How To Resupply on the John Muir Trail and John Muir Trail Supplies Shopping List.
Bears & Supplies Storage
For many hikers, the possibility of encountering bears is one of the scariest parts of planning a JMT hike. But the reality is that with so many other people on trail, youll be lucky to spot a withstand in its natural habitat. In general, bears and other wildlife prefer to stave tropical contact with humans and the JMT is a veritable superhighway through the wilderness.
However, each year a few clever Sierra bears learn to socialize people and campsites with food, usually when people are wasteful well-nigh leaving supplies unattended or unsecured in camps or cars. This can be very dangerous, expressly for the bears. A fed withstand is often tragically a sufferer bear.
To alimony bears yonder from human food, all hikers on the John Muir Trail are required to siphon an tried withstand canister. These sturdy plastic or metal containers are the only proven way to alimony bears from accessing supplies in the Upper Sierra, where bears are whiz climbers and tall trees are rare.
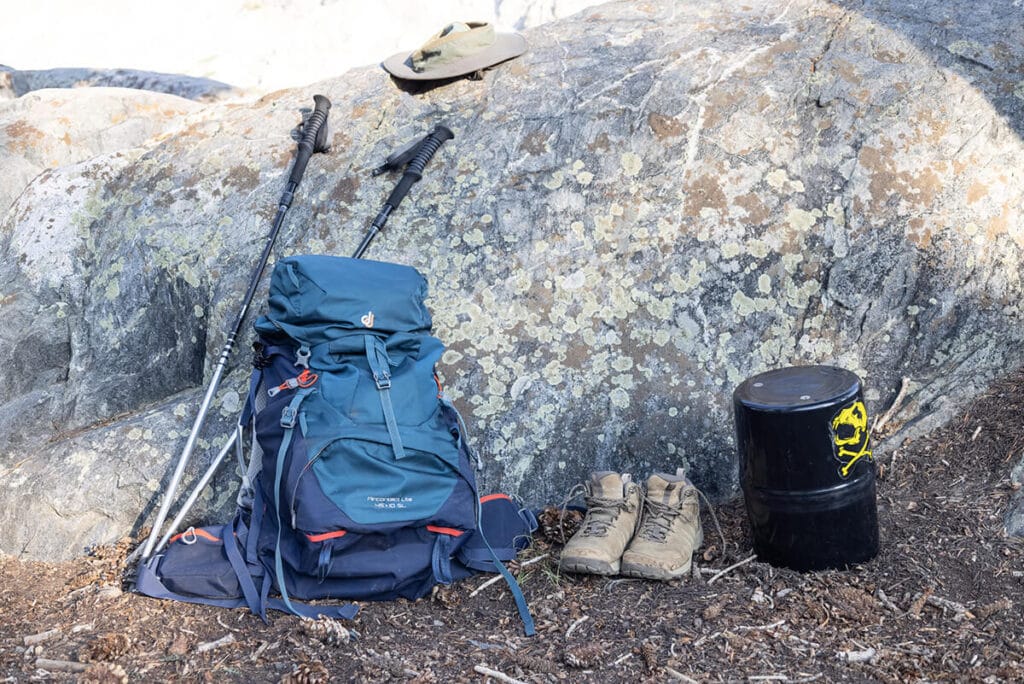
You can buy your withstand canister or rent one from ranger stations for a small fee. Ursacks and Opsacks are not winning alternatives on the JMT. Woodland rangers will trammels that you have a canister when they trammels your permit.
While hiking, you can alimony snacks wieldy in pockets of your walkabout but in camp, all food, trash, and scented items need to fit inside your canister, including toiletries like toothpaste and lotions. Alimony a wipe camp! Dont leave supplies or scented items out if youre not in the act of consuming them. At night, the locked canister should be placed at least 50 feet from your tent, in a location where its not hands kicked off a cliff or into a creek. Withstand canisters are designed to be too unwieldy for bears to pick up or siphon yonder but they will sometimes roll the canister virtually a bit.
If you do see a withstand on trail, alimony calm, speak to the withstand so they can identify you as human and requte them as much space as possible. Never tideway or follow a withstand or make it finger cornered. If a withstand comes into your camp, ventilator it yonder by yelling and banging your pot! Get mad. Scold it like its a bad dog. Dont let it think its welcome to explore your camp. If the withstand doesnt leave, or plane if it does, consider moving to flipside location or teaming up with fellow campers. Woebegone bears are not normally a threat to people, and are usually dissuaded by several people all yelling at the withstand to go away.
What To Pack on the John Muir Trail
When it comes to packing for backpacking, less is more: the less weight you bring, the increasingly you will enjoy your trip. Theres nothing worse than suffering under the weight of a too heavy backpack, expressly on a multi week hike like the JMT.
Before my JMT thru-hike, my hiking partner and I sat lanugo with all of our gear and a kitchen scale, weighed out everything, and entered it all into a spreadsheet. Seeing the numbers wrenched lanugo by item really helped shave off a few pounds. I traded out my trusty (but heavy) Osprey pack for a much lighter Granite Gear Blaze 60 pack, lightening my load by nearly 2 pounds.
That might not sound like much, but when youre delivering weight for over 300 miles, every ounce counts! By the time I hit the trail, I had whittled my wiring weight lanugo to 22 pounds, not including supplies and water. So plane fully stocked with 8 days of food, my longest supplies siphon between resupplies, my pack still weighed under 40 pounds.
If you can sire to invest in some new gear, do your research and be very selective well-nigh what you buy. Gear technology and innovations have really velocious in the last few years and there are lots of lightweight options for backpacking tents, sleeping bags, stoves, and clothing.
Everybody has their personal preferences when it comes to sleep systems, cooking systems and suit systems. Unfortunately, the lightest gear is often expensive and not as durable as you might hope. For intensive use, such as on the JMT, it often makes sense to pick a slightly increasingly rugged option so itll survive your trip and hopefully a few more!
The weightier translating is to test your gear and really get to know it surpassing you set off on your JMT adventure. Plan to take at least one overnight shakedown hike superiority of your trip. If possible, take multiple shakedown trips! Ideally, over multiple nights! Alimony notes well-nigh what you use and what you dont use. You may be worldly-wise to waif a few unnecessary items superiority of your JMT adventure. Remember less is increasingly and every ounce counts!
For Kristens detailed packing and gear list, visit our Complete John Muir Trail Gear List and read Ultralight Backpacking Tips for translating on how to shed weight.
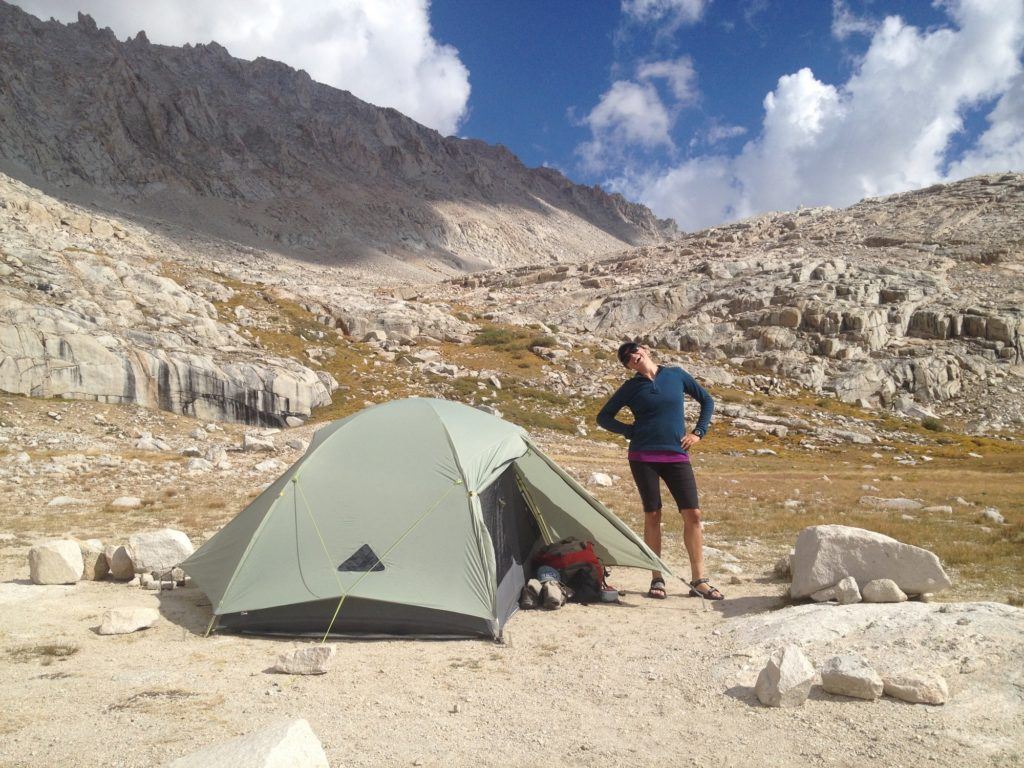
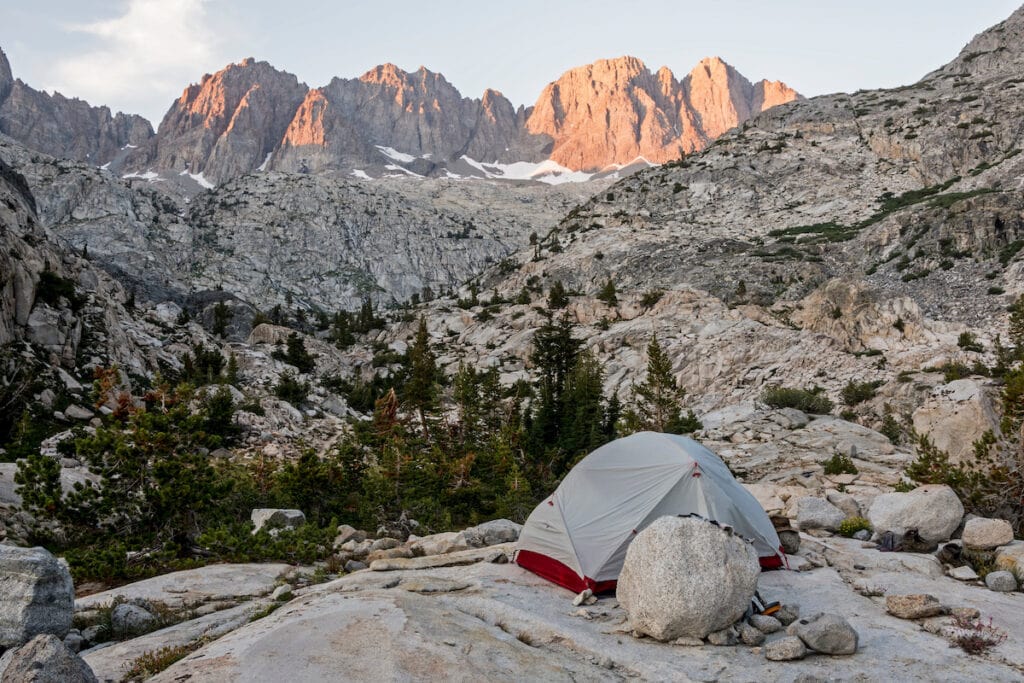
Where to Zany on the John Muir Trail
Hiking all 211 miles of John Muir Trail takes virtually 20 days, which ways youll moreover get to spend virtually 20 nights sleeping under the stars. Campsites withal the JMT are often spanking-new and plentiful so dont stress too much well-nigh finding a spot to sleep each night. Of course, some options are increasingly spectacular than others so weve placid our favorite campsites into one post: 15 Weightier John Muir Trail Campsites.
So what makes a unconfined campsite?
First, it should be a previously established tent site that is increasingly than 100ft yonder from any water source. We’ll discuss increasingly well-nigh Leave No Trace on the JMT in the pursuit section.
Second, it should be flat. Theres nothing increasingly worrying than rolling downhill all night.
Third, it should be quiet. With so many campsites in so much wilderness, you should not have to listen to somebody snoring in their tent a few yards away.
Fourth, it should be near water. On the JMT, this requirement is usually easy. The trail crosses myriad lake basins and youll rarely be far from water for increasingly than a mile or two. Plane if thees not a lake or creek right by your campsite, youll likely be worldly-wise to fill up in the late afternoon surpassing you strike camp. Just be sure to follow LNT principles and set your tent up at least 100ft yonder from water sources.
Beyond the vital requirements, the weightier campsites are the ones that sire spectacular views of sunsets, moonrises, the Milky Way, sunrises, or all of the above. But while we all love a wide-open vista, alimony in mind that if its stormy, youll want some protection from the wind and lightning. The only thing worse than a tilted tent is having to listen to your tent flapping virtually you all night. Exponentially worse is worrying well-nigh your tent stuff struck by lightning! If storms are threatening, seek a low spot for your tent, perhaps in the trees, but unchangingly trammels for sufferer branches and trash that might fall onto your tent in a storm.
When looking for a campsite, alimony in mind that while you can often spot tent sites withal the trail, you might not have much privacy here as other hikers will be walking right by your tent. But if you explore a little off the trail, youll be sure to find many increasingly site options a short loftiness yonder that will be much quieter. When exploring yonder from the trail, be sure to alimony your situation so you can find your way back!
With so many site options on the JMT, theres no need to create new tent sites. See our next section on Leave No Trace for guidelines on how to enjoy the wilderness without marring the wits for others.
How To Leave No Trace on the John Muir Trail
You know that old saying, take only photos, leave only footprints? Well if at all possible, stave plane leaving footprints! Ideally, without youve hiked the John Muir Trail, there should be no sign that you were overly there. Thats the ethos encouraged by the seven cadre principles of Leave No Trace outdoor ethics:
- Plan superiority and prepare
- Camp on nonflexible and durable surfaces
- Dispose of waste properly
- Leave what you find
- Minimize campfire impacts
- Respect wildlife
- Be considerate of other visitors
With so many people enjoying the Sierras pristine wilderness and untouched landscapes on the John Muir Trail, its important that everybody do their part to preserve this wilderness for future visitors. The JMT passes through upper tall environments, which are incredibly rugged but moreover incredibly delicate. A few LNT techniques to alimony in mind when hiking the JMT:
- Always set your tent up on an existing tent site. There are many established campsites on the JMT – you should not create new sites or set your tent up on vegetation.
- Always zany at least 200 feet from water. Creeksides and lakeshores are hands eroded and often vegetated and you may be blocking wildlifes wangle to water sources.
- Scatter dishwater. Also, do not dump supplies waste or supplies particles in creeks or lakes.
- Never use soap in creeks. You shouldnt need soap on your hike, save the weight and leave it at home. A fingernail skim can do wonders for dirty hands, feet and lower legs, no soap needed.
- If you want to swim in the many tall lakes on the JMT, stave slathering on sunscreen or lotion surpassing you jump in.
- Pack out all garbage, including toilet paper. Do not shrivel or situate anything. Used toilet paper can be unsober in dog waste tons (bring a roll, they are light and durable) and then double unsober in a ziplock bag. On Mount Whitney hikers are required to use wag tons for solid waste. You can pick up a wag bag at the Crabtree Meadows Ranger Station surpassing you uncork your climb up Whitney.
- On the rest of the JMT, pee at least 100 feet yonder from water sources, and step well yonder from the trail and campsites. To poop, walk at least 100 feet yonder from water sources, the trail and campsites, dig a slum 6 to 8 inches deep (carry a lightweight trowel for digging, sticks are not sufficient tools), and situate your waste, taking superintendency to leave the surface unmarked as much as possible. Pack out all toilet paper.
- Do not build waddle cairns or leave trail markers.
- Do not enshroud supplies anywhere on trail (this is not an towardly way to resupply).
- All JMT hikers are required to siphon and use an tried bear canister.
- Keep a wipe camp. Store all supplies and scented items in your withstand canister unless urgently eating. Mice, skunks, and bears are all attracted to human supplies smells.
- Fires are only unliable in a few areas on the JMT but consider going fire-free on your trek to conserve limited wood resources and reduce the potential for forest fires. California is a tinder box!
Remember that Leave No Trace is not woebegone and white but well-nigh making the weightier possible visualization to minimize our impact in the specific environment and circumstances that we are in. Not a set of dos and don’ts, but a set of guidelines to help us leave the places we visit as good or plane largest than we found them.

Additional JMT Resources, Maps, & Guidebooks
The John Muir Trail is a legendary route that has ferried people through the rugged heart of the Sierra for thousands of years (originally as the N��m� Poyo). Much has been written well-nigh the JMT and the Sierra by many poets and adventurers from Muir himself into the modern day.
For a comprehensive reading list of all things JMT, trammels out our post on the Best John Muir Trail Maps, Books, Apps and Resources, from Muirs archetype Wilderness Essays to Elizabeth Wenks John Muir Trail Guidebook to the weightier paper maps and apps to help plot and track your route.
READ NEXT
Planning a JMT thru-hike? Heres our top John Muir Trail posts:
What else do you want to know well-nigh hiking the John Muir Trail? Do you have any spare John Muir Trail planning tips or advice? Let us know in the comments below!
The post Complete John Muir Trail Planning Guide appeared first on Bearfoot Theory.